The advent of modern technology and broadband internet access has had an enormous impact on the audio bonus. Gone are the tape decks and careful splicing that used to go into their creation. Now, creating an audio bonus is an easy task with a bunch of mp3s and a simple audio editing program.
It's also simple to go one step further, adding a video layer with clip numbers, such as in this example (5.5 megs). These instructions will show you how to add this video layer to your audio bonus, using iMovie software on OSX.
Create and order your clips (mp3 format works fine). You can shuffle them around in iMovie, but it's easier to do it elsewhere. A playlist in iTunes works fine for trying out various orderings of your clips. Once you've settled, you're ready to add title cards.
 |
| The Playhead |
 |
| Aligning 2 clips |
At this point, we are ready to add the titles. You are welcome to make your own, or use the 50 provided here (if you need more than 50, you're on your own). Save them as jpegs (If iMovie has a problem importing them, open them in Preview and export them to jpeg there). Again, use Import to bring them in, either one by one, or just put them all on the shelf for use later.
For each each title card in turn:
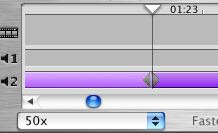
If an audio clip is longer than the video clip (5 seconds), add the next video clip to the track, then drag it to the right. It will extend the previous clip to the length you need. If you want to be really precise, drag the clip so that the previous clip is longer than needed, then split that clip as above. When you delete the extraneous piece, the subsequent track will realign itself to the right point.
Once you've done all that, you're all set! Just export the movie (File > Export Movie) at medium quality (low quality may work, but often sounds tinny) and your audio bonus is ready to go. Other stuff is certainly possible within iMovie, and even more advanced editing can be done in Final Cut Pro. Experiment!